Business scenario: A company such as ABC Inc. generates invoices for its customers for a variety of services, fees, or charges that must be itemized and posted to specific ledger accounts. These ledger accounts must also have dedicated financial dimensions at invoice line level. There is, however, a relatively high number of invoices generated each day. In order to ease out their employees' daily tasks, businesses want to automate the invoice generation process.
Solution approach: Dynamics 365 Finance Free Text invoice is the best suitable approach considering the given business scenario to support “Create FT invoice by using the predefined templates” Observations: Dynamics 365 Finance & Operations product version 10.0.28 (10.0.1265.60) & Update52 (7.0.6441.74) does support Free text invoice templates functionality to define number of invoice lines along with dimensions.
Despite the fact that there are multiple invoice lines in the template, the user can only set a single value for the financial dimension (perhaps a bug).
- User cannot define a dedicated dimension at the invoice line in the template form
- If the user creates an FT invoice with multiple lines with dedicated dimension and save the record as a template then financial dimension is not visible in the template form
As Microsoft's support team works to resolve this issue, the following approach/workaround can be utilized by Dynamics 365 Finance consultants to define dedicated financial dimensions on individual invoice lines using FT invoice templates.
Workaround: DRAFT Free Text invoices can be created to generate the required FT Invoice template, and later on you can clean the draft records and leverage the already generated templates.
Here is a step-by-step explanation of the approach/workaround.
Test Data Preparation in USMF LE:

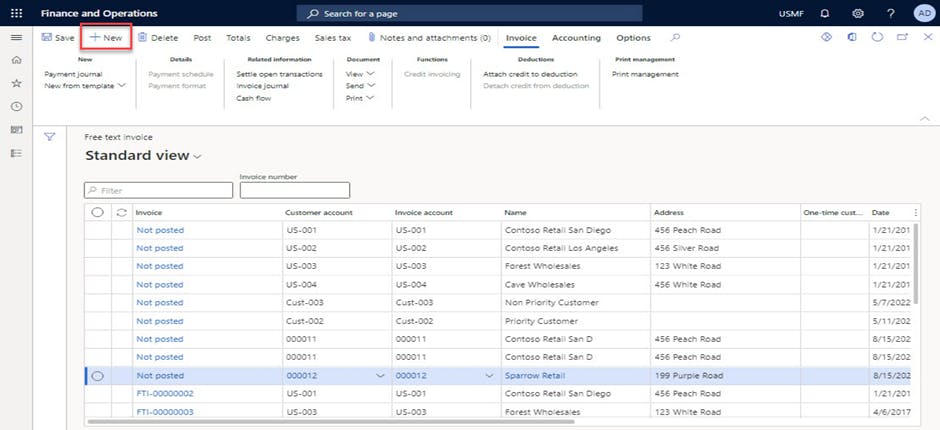
- Go to Accounts receivable > Invoices > All free text invoices.
- Click New.
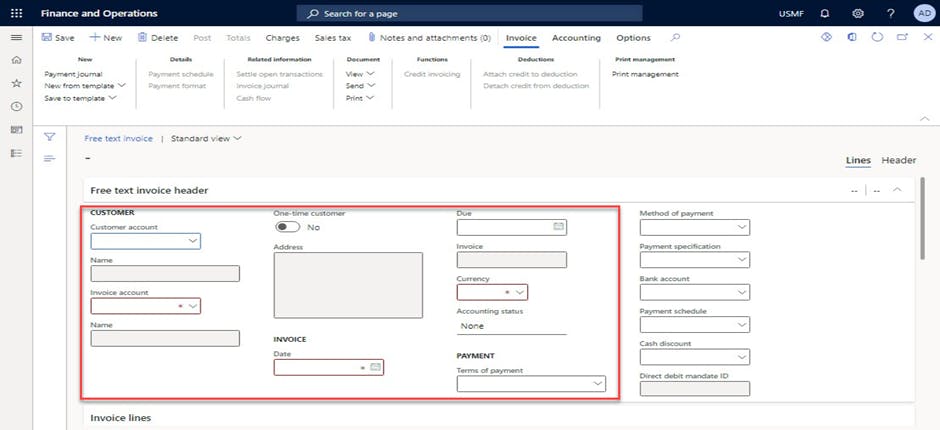
- In the Customer account field, enter or select a value.
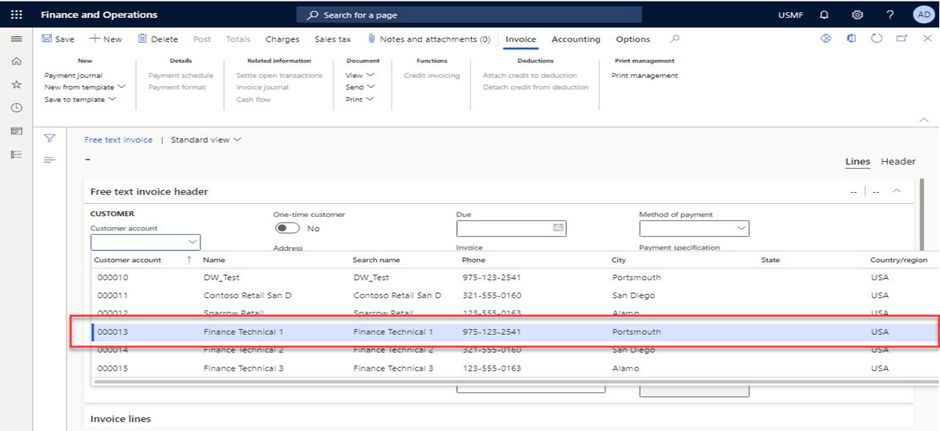
- In the list, select customer & system will create FT header record.
- Navigate to Invoice lines fast tab.
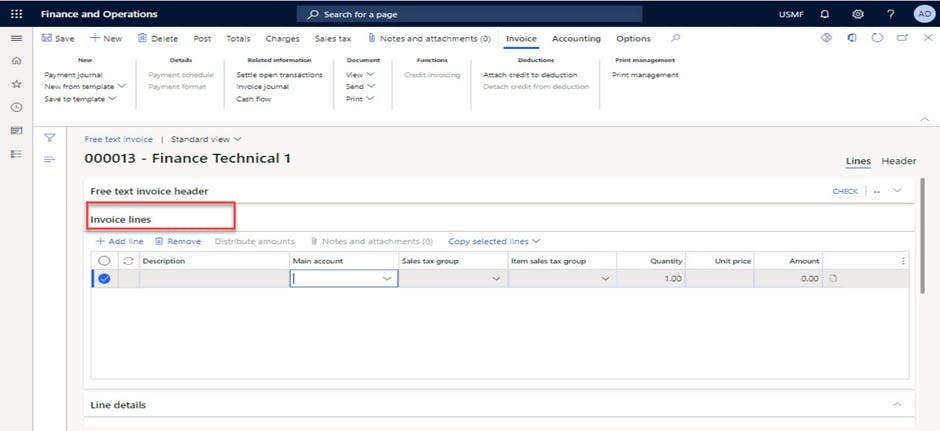
- In the Main account field, specify the desired values.
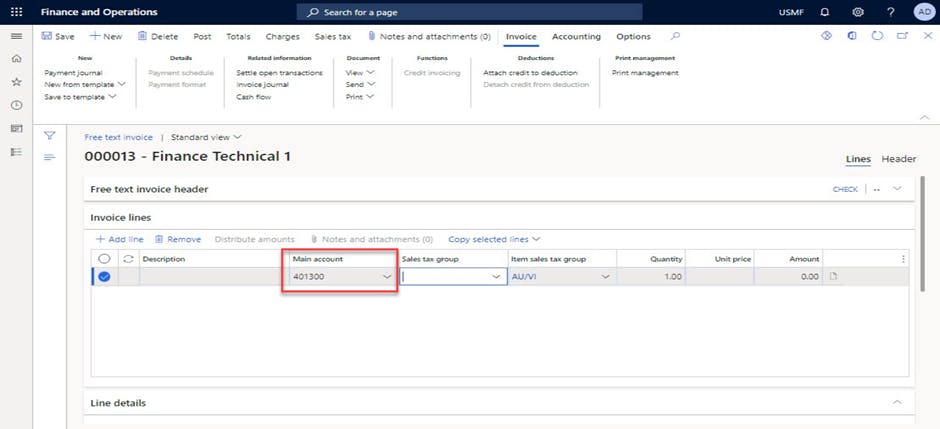
- In the Sales tax group field, enter or select a value or leave blank.
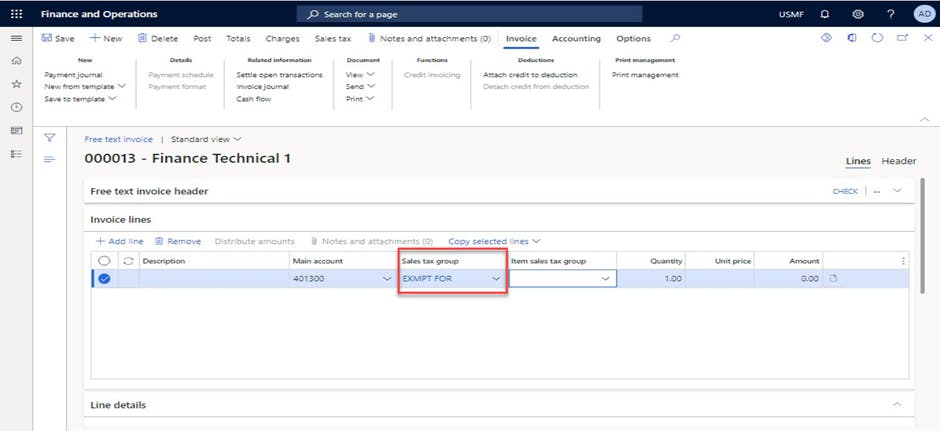
- In the Item sales tax group field, type a value, if required
- In the Amount field, enter a number.
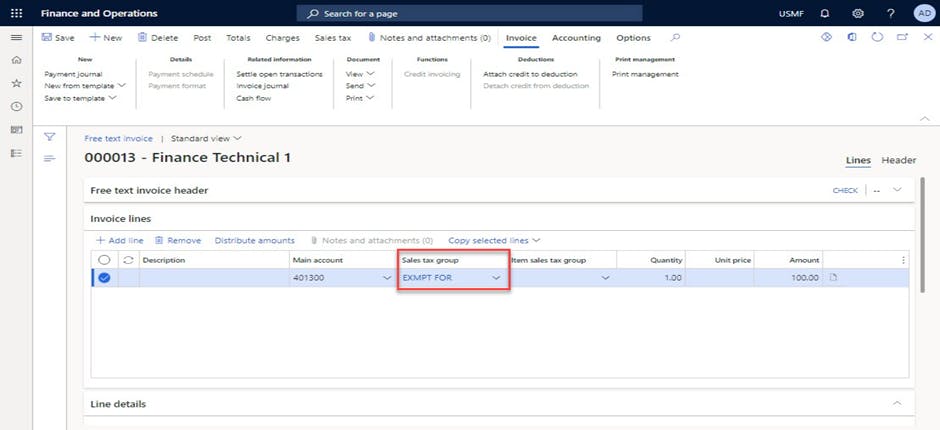
- Click Add line option to create another line.
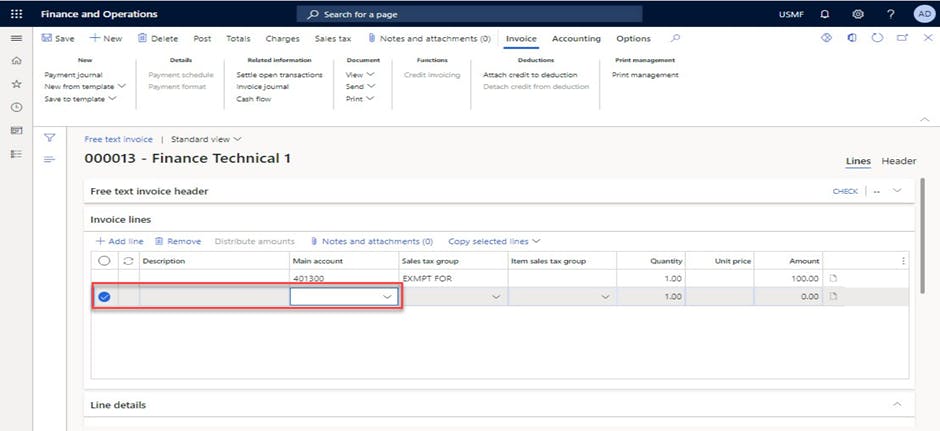
- In the Main account field, specify the desired values.
- In the Sales tax group field, enter or select a value.
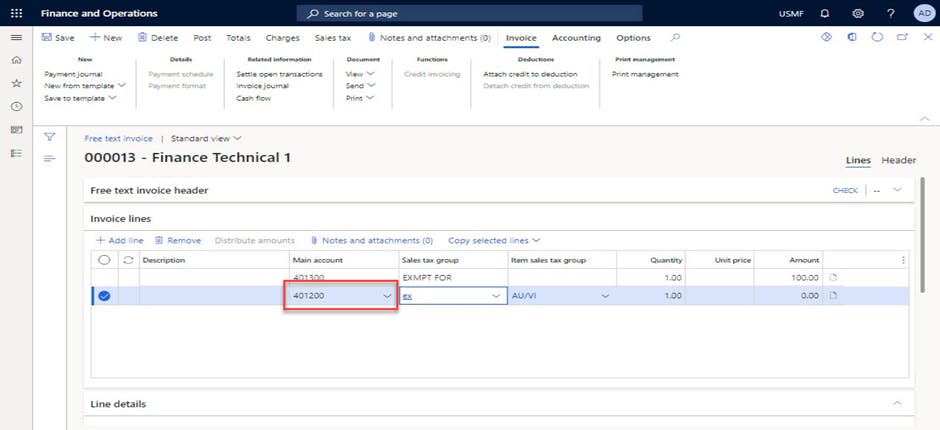
- In the Amount field, enter a number.
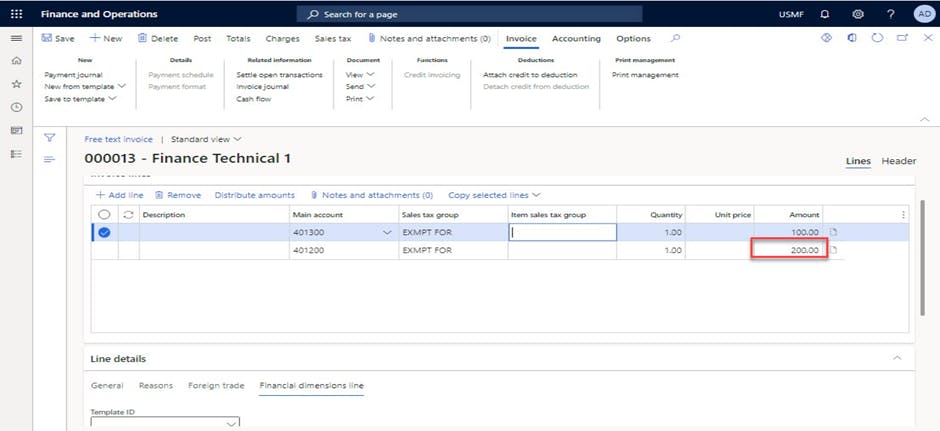
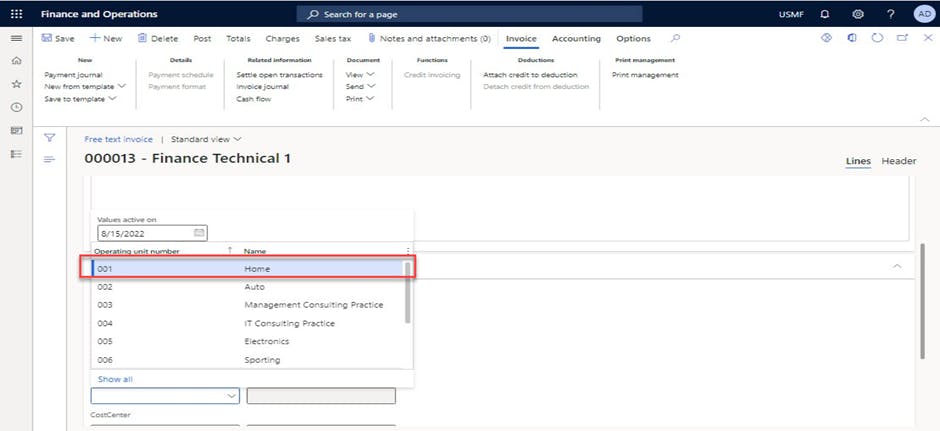
- In the BusinessUnit value field, enter or select a value for the first invoice line.
- In the CostCenter value field, enter or select a value.
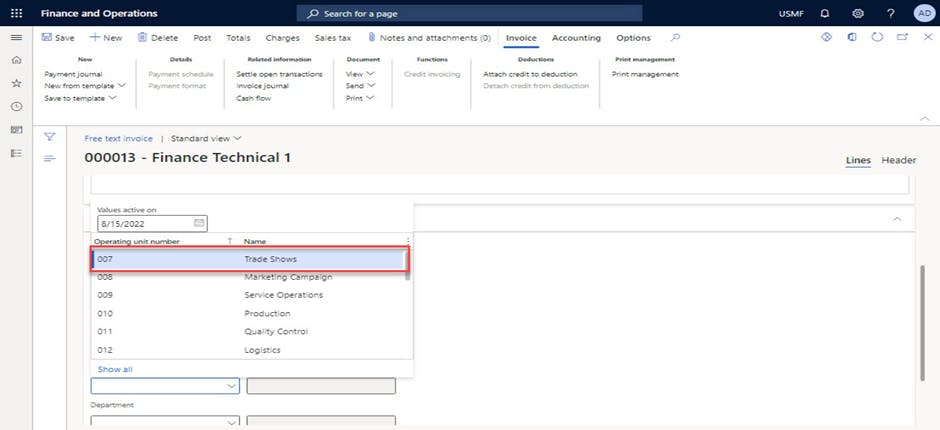
- In the list, select second invoice line.
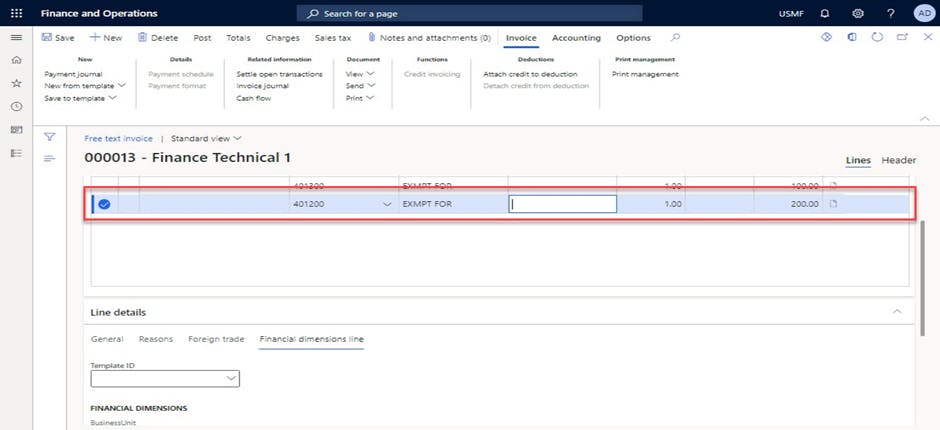
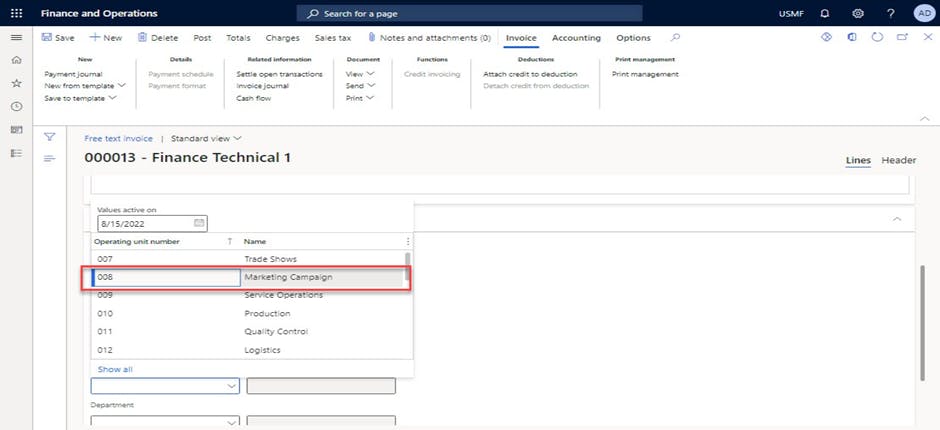
- In the BusinessUnit value field for second invoice line, enter or select a value
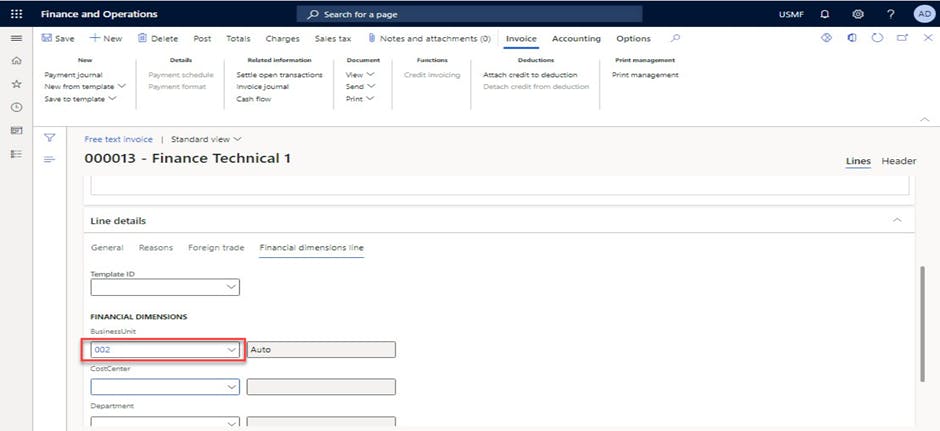
- In the CostCenter value field for second invoice line, enter or select a value.
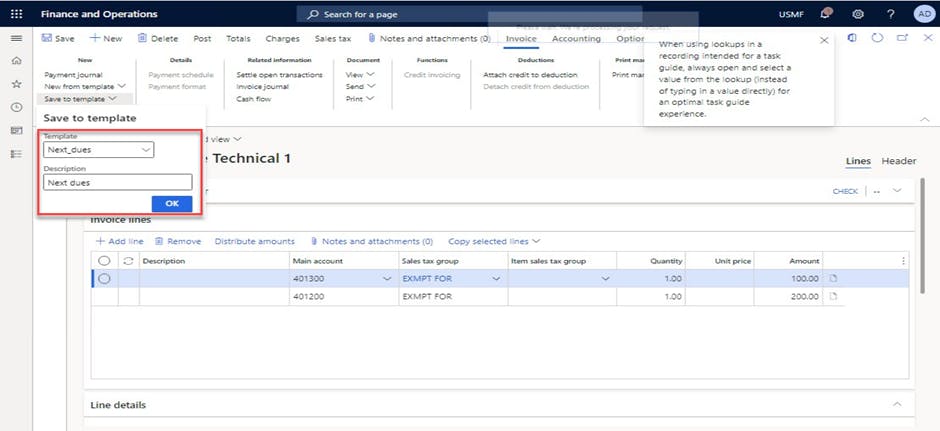
- Click on “Save to template” option and enter the template name and description to save the template
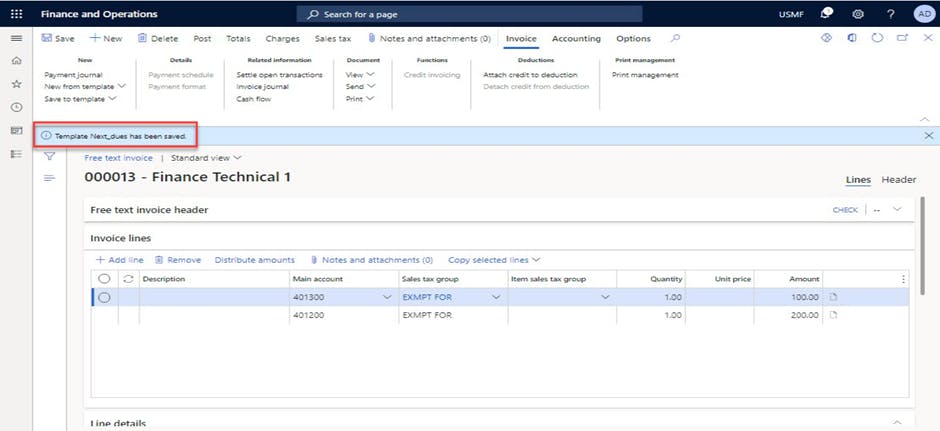
- Go to Accounts receivable > Invoices > Recurring invoices > Free text invoice templates.
- In the list, find and select the newly created template record.
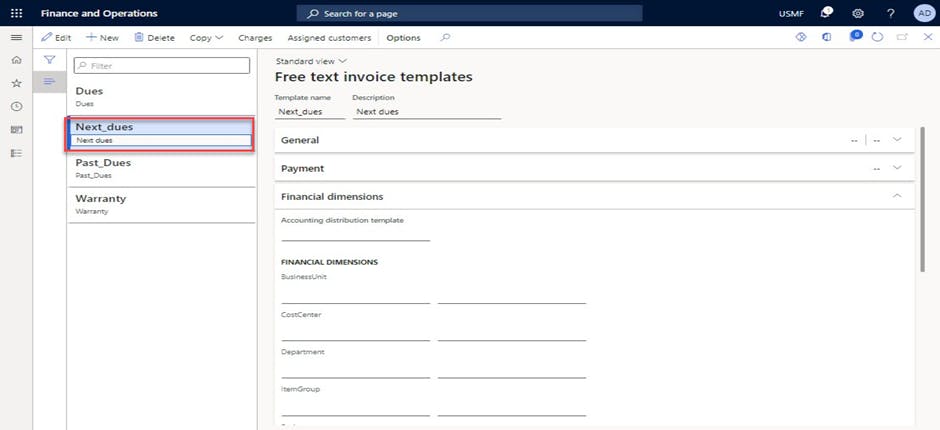
- Validate invoice lines & Dimensions (dimension values are empty).
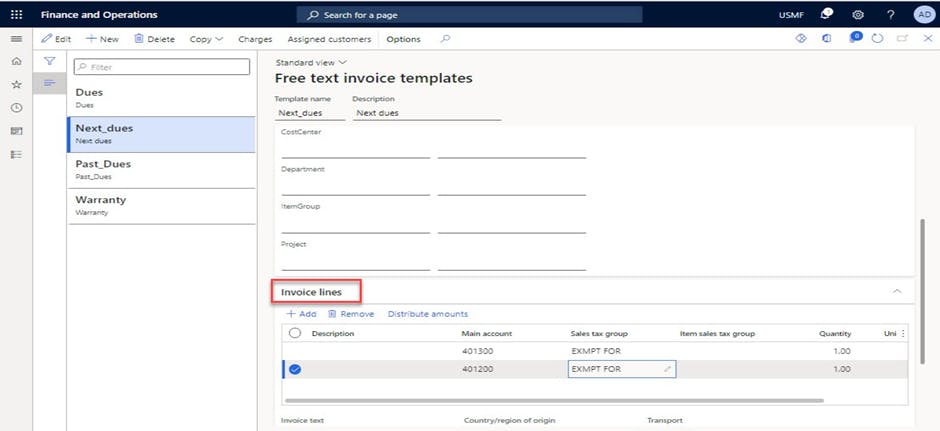
- Go to Accounts receivable > Invoices > All free text invoices.
- Click New from template to open the drop dialog.
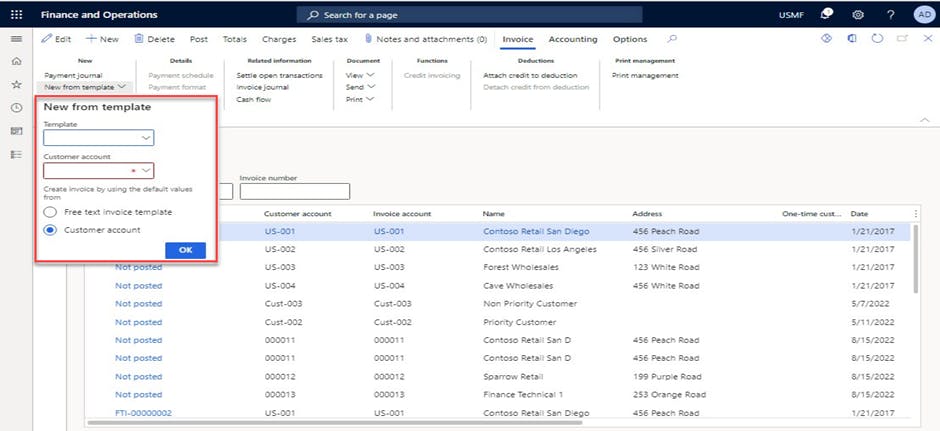
- In the Template & Customer account field, enter or select a value.
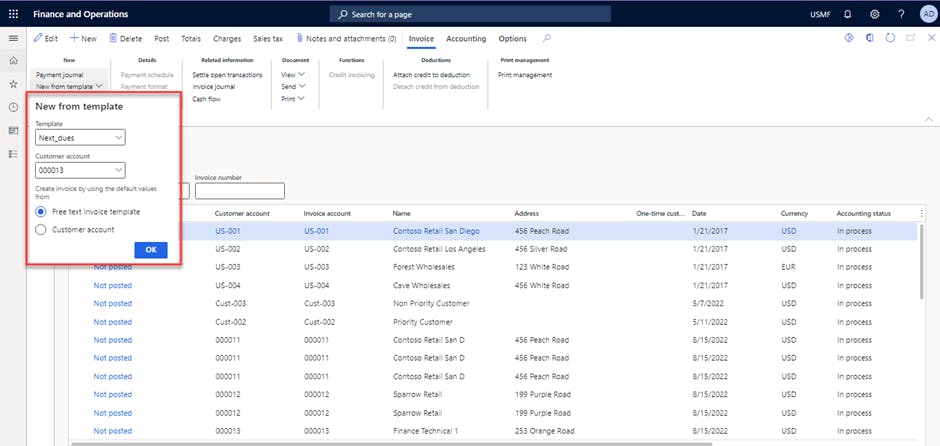
- Click OK.
- Validate the dimension values which got created through template.
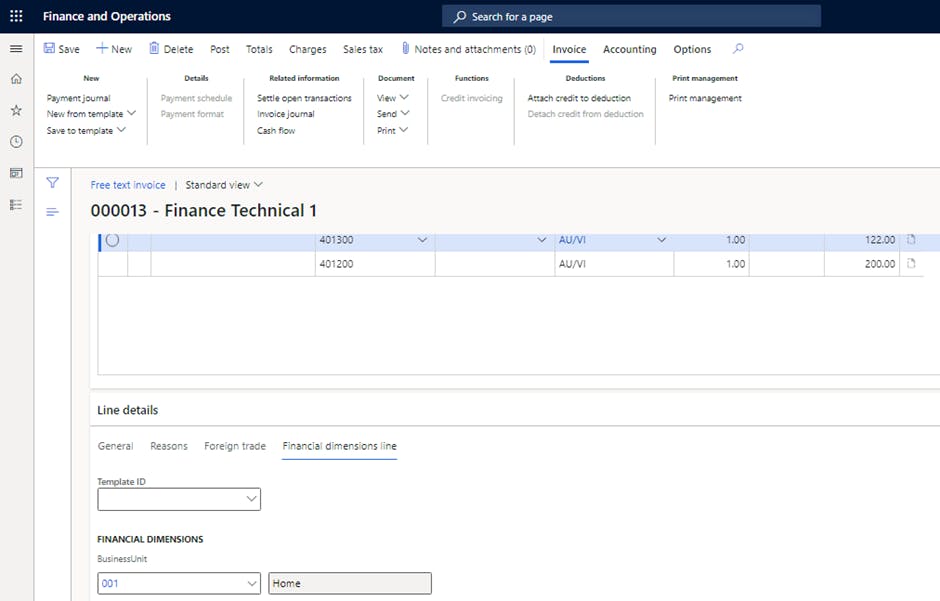
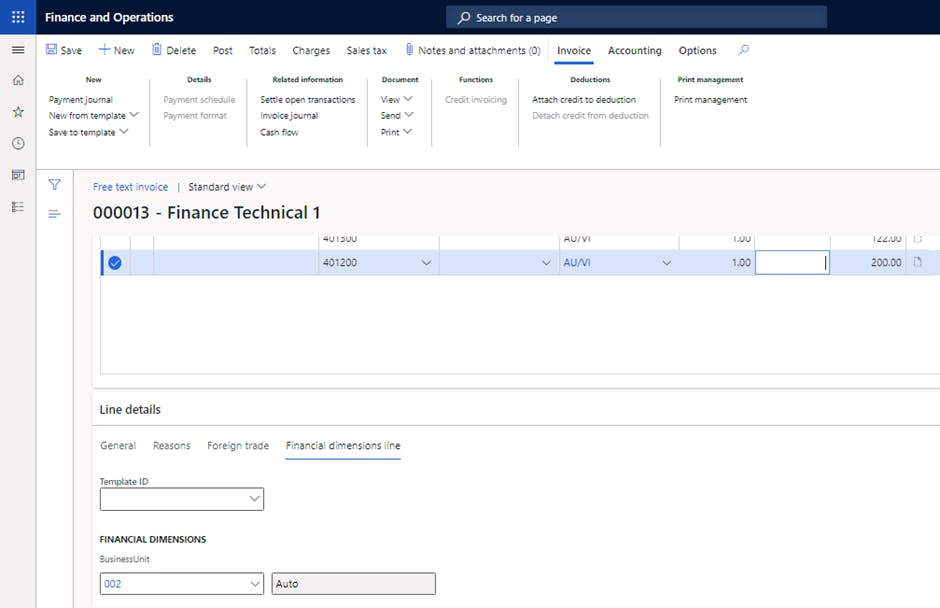
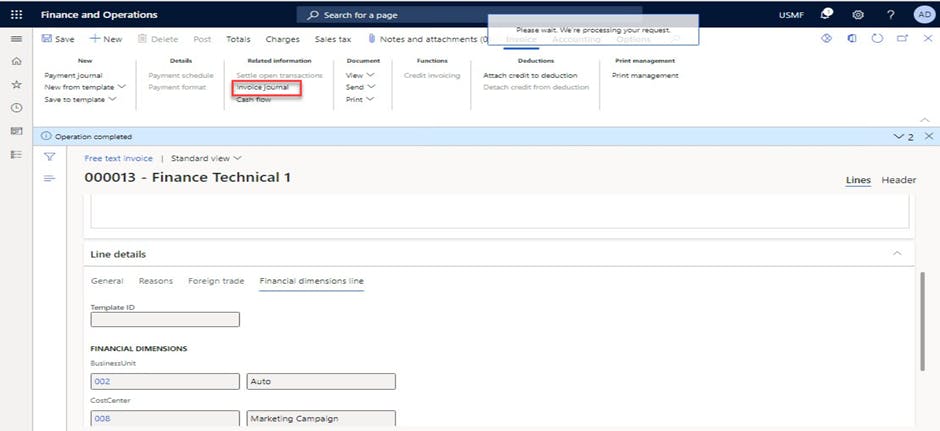
- Click Post.
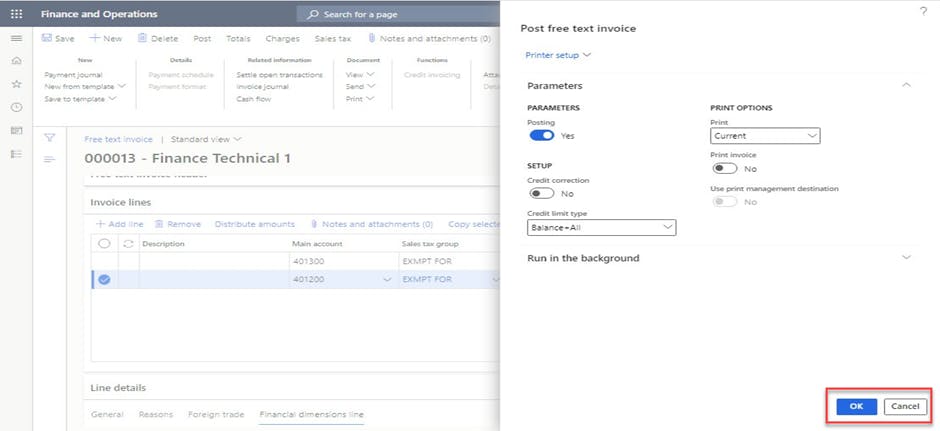
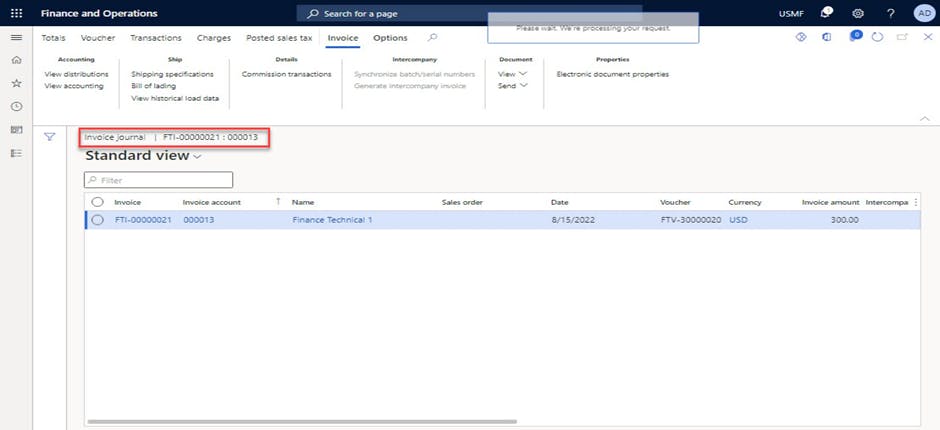
- Click Invoice journal.
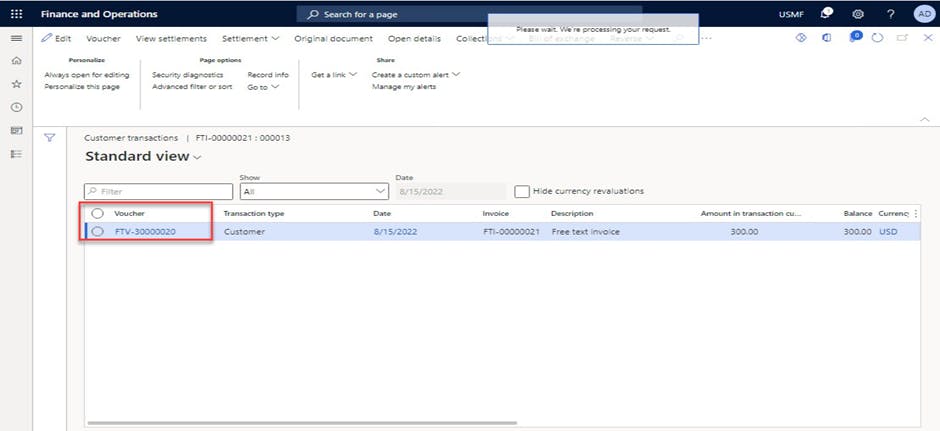
- Click View accounting.
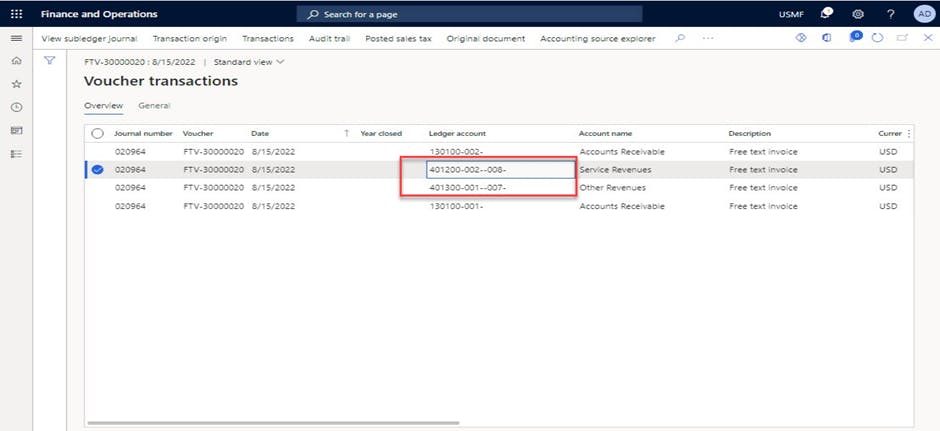
- Click Voucher.
- Validate posted voucher transactions with correct dimension values.
Conclusion
The above workaround/suggestion could also be utilized when you create a Free Text invoice using the template feature, if you wanted to take it a step further.
Thank you for Reading - Let's Connect!
Enjoy my blog? For more such awesome blog articles - follow, subscribe and let's connect on LinkedIn , Twitter ,YouTube
Stay tuned!

